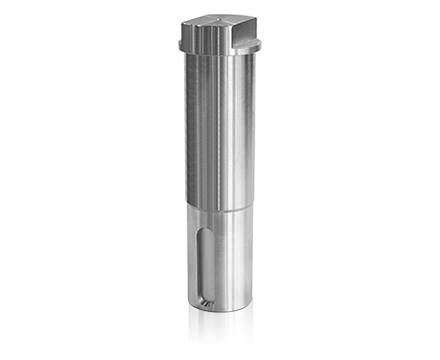
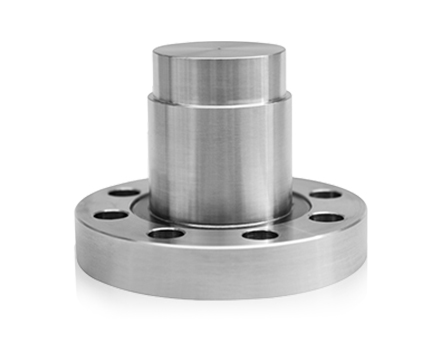
Replacing a worn valve component is not simply a matter of finding a part that looks similar to the original. The stem has to work with the existing valve, connect properly with the operating parts, and maintain smooth movement after installation. A mismatch can make installation difficult or create operating problems later.
The condition of the original component also provides useful information before a replacement is ordered. A stem may show signs of wear, corrosion, deformation, or increasing resistance during operation. In some cases, the surrounding seal or connection may be responsible for the problem rather than the stem itself.
For buyers and maintenance teams, the process is therefore better handled as a series of checks. The original component should be assessed, its dimensions recorded, its connection examined, and its material considered in relation to the working environment. Seals and installation conditions also deserve attention because they can affect how the replacement performs once fitted.
When Does a Ball Valve Stem Need to Be Replaced
A stem does not necessarily need replacement simply because a valve has been in service for a long time. The condition of the component and the way the valve operates provide more useful indications.
A stem may require attention when turning the valve becomes noticeably harder, the operating handle no longer moves as expected, or movement feels uneven. Visible corrosion, bending, surface damage, or looseness around the connection can also indicate that continued use should be assessed.
Leakage around the stem area deserves separate attention. The source may be a damaged seal rather than the metal component itself. Replacing the stem without checking the sealing area can leave the original problem unresolved.
It is useful to compare the current operating condition with the valve's normal behavior. Changes that appear gradually can be easy to overlook during routine use. A sudden change may be easier to identify, but either situation warrants inspection before ordering a replacement.
Several observations can help establish whether replacement is appropriate:
- The stem is visibly damaged or deformed.
- Movement has become difficult or inconsistent.
- The connection with the handle has become loose.
- Corrosion has affected the working surface.
- The component no longer fits correctly with the valve assembly.
- Inspection shows damage that cannot be addressed through routine maintenance.
The condition of related components should be considered at the same time. This creates a clearer basis for choosing a replacement rather than treating the stem as an isolated part.
Which Ball Valve Stem Dimensions Should Be Measured Before Replacement
Once replacement appears necessary, measurement becomes an important part of the selection process. A visually similar part can still differ in a dimension that prevents proper installation.
The stem diameter is one of the dimensions that should be checked. Its length also matters because the component needs to sit correctly within the existing assembly. Depending on the valve design, the shape and dimensions of the connection area can be just as important as the overall length.
Measurements should be taken from the original component where possible. If the original stem is damaged, the corresponding dimensions of the valve and connected operating parts can provide additional information.
| Dimension to Check |
Why It Matters |
| Stem diameter |
Determines how the stem fits within the valve |
| Stem length |
Affects its position and engagement |
| Connection dimensions |
Help confirm compatibility with operating parts |
| End shape |
Influences how the stem engages with the valve |
| Sealing area |
Helps assess compatibility with the existing seal |
Measurement should be consistent. For example, measuring only the exposed portion may give an incomplete picture of the actual length required. Similarly, checking diameter without examining the connection can lead to a part that fits one area but not another.
A simple record of the original dimensions can make supplier communication easier. Clear measurements also reduce the need to rely on appearance when comparing replacement options.
How to Match a Ball Valve Stem With the Existing Valve
A replacement needs to match the valve as an assembly, not merely as an individual component. This is where dimensional compatibility becomes more than a measurement exercise.
The stem has to sit correctly in its intended position and engage with the internal valve components. Its upper connection must also work with the operating arrangement. If any of these relationships differ from the original design, installation may require modification or may not be practical.
The existing valve should therefore be identified by its relevant construction details before a replacement is selected. The original stem can then be compared against the proposed component.
A useful comparison includes:
- Overall stem dimensions
- Connection shape and fit
- Position of the sealing area
- Relationship with the valve ball
- Interface with the operating handle or actuator
- Clearance around the installed component
Compatibility also depends on how the valve is used. A component intended for one arrangement may not behave in the same way when installed in another, even if the external dimensions appear close.
This is particularly important when the original part is no longer available for direct comparison. In that situation, information from the valve itself becomes more important. Photographs, measurements, drawings, and existing component details can help establish whether the replacement is suitable.
How Does the Stem Connection Affect Ball Valve Replacement
The connection between the stem and the surrounding operating parts is easy to overlook because it is often hidden once the valve is assembled. Yet a small difference in the connection can prevent an otherwise suitable replacement from working correctly.
At the upper end, the stem may need to engage with a handle or another operating component. At the other end, it has to transfer movement to the valve ball. The connection therefore affects how turning force is transmitted through the assembly.
A replacement should not be selected solely according to stem length or diameter. The connection profile needs to be considered as well.
For example, a replacement may have a suitable body diameter but a different end configuration. It may physically enter the valve while failing to engage correctly with the operating component. In another case, an incorrect fit may create looseness that becomes noticeable during operation.
The condition of the original connection can also reveal why replacement is being considered. Wear at the interface may have developed gradually, while deformation may indicate excessive force or an installation issue.
Checking the connection before purchase helps separate two questions:
- Will the replacement fit into the valve?
- Will it transfer movement correctly after installation?
Both need to be answered before the component is treated as a suitable replacement.
Which Ball Valve Stem Materials Suit Different Service Conditions
Material selection should follow the environment in which the valve operates. There is no single material choice that suits every service condition.
The medium passing through the valve is one consideration. Moisture, corrosive substances, temperature changes, and the surrounding atmosphere can also influence material suitability. The stem may be exposed directly to some conditions while other parts of the assembly experience them indirectly.
Stainless steel is commonly considered when corrosion resistance is important, while other metal choices may be appropriate depending on the mechanical and environmental requirements. The relevant question is not simply which material is available, but whether its properties are compatible with the intended service.
| Service Condition |
Material Consideration |
| Moist environment |
Resistance to corrosion and surface deterioration |
| Corrosive medium |
Compatibility with the surrounding medium |
| Temperature changes |
Stability under the expected operating conditions |
| Frequent operation |
Resistance to repeated mechanical wear |
| General service |
Balance between mechanical requirements and environment |
Material should also be considered together with the seal and mating components. A suitable stem material does not automatically mean that every surrounding component is suitable for the same conditions.
When replacing an existing part, examining the original component can provide useful clues. Surface discoloration, corrosion, scoring, or unusual wear may indicate that the previous material or service conditions deserve closer attention.
Why Should Ball Valve Stem Seals Be Checked During Replacement
The sealing area deserves attention whenever the stem is removed. A new component installed against an aged or damaged seal may not resolve leakage.
Seals can lose their ability to maintain contact over time. Repeated movement, environmental exposure, compression, and surface wear can all affect their condition. If the existing seal has already deteriorated, installing a replacement stem against it can create another maintenance problem shortly after the repair.
The stem and seal also need to work together. Surface damage on the stem can affect the sealing contact, while an unsuitable seal can increase resistance during operation. This means the sealing area should be inspected before the replacement is finalized.
During inspection, look for signs such as:
- Visible cracking or deterioration
- Flattened or damaged sealing surfaces
- Leakage around the stem area
- Unusual resistance during movement
- Scratches or rough areas where sealing occurs
It is also worth checking whether the replacement has the same sealing arrangement as the original. A difference in the position or geometry of the sealing area can affect installation even when the main stem dimensions appear correct.
Considering the seal at the same stage as the stem prevents the replacement process from becoming narrowly focused on one component.
What Installation Errors Can Damage a Ball Valve Stem
Correct selection can still be undermined by poor installation. The component needs to be positioned carefully so that its connections and sealing surfaces remain properly aligned.
Forcing a stem into place is one issue to avoid. Resistance during installation can indicate incorrect dimensions, misalignment, or interference with another component. Applying additional force without identifying the cause can damage the stem or the surrounding parts.
The connection should also be aligned before the operating handle is fitted. If the parts are forced together when their profiles do not correspond, the connection may become damaged or loose.
Another concern is damage to the sealing surface. Scratches or deformation in this area can affect sealing after assembly. Clean handling is therefore important, particularly around surfaces that need to maintain close contact.
Installation should also follow the existing valve arrangement rather than introducing unnecessary changes. If a replacement does not fit naturally, that is a reason to recheck the selection rather than assume that modification will solve the problem.
A careful installation sequence generally involves checking the fit, positioning the component correctly, confirming the connections, and then testing movement before returning the valve to normal service.
How to Check a Replacement Ball Valve Stem After Installation
The final inspection should confirm that the replacement works with the valve as intended. Visual inspection alone is not enough because some problems only become apparent when the operating parts are moved.
Start by checking whether the stem sits in the expected position and whether the handle or operating component is securely connected. Movement should be consistent rather than excessively tight, loose, or uneven.
The sealing area should then be checked for signs of leakage. If leakage appears immediately after installation, the cause should be investigated rather than assuming that the replacement component itself is defective.
It is also useful to observe the connection during operation. Unusual movement between the handle and stem can indicate an engagement problem. Resistance that remains after replacement may point to an issue elsewhere in the valve assembly.
A post-installation check can therefore focus on four practical areas:
- Position: the component is seated correctly.
- Connection: operating parts engage securely.
- Movement: turning is consistent and appropriate.
- Sealing: the stem area remains free from abnormal leakage.
These checks provide a practical way to verify whether the replacement has addressed the original issue and whether further inspection is needed.

 English
 中文简体
中文简体
 русский
 Español
 عربى
عربى
 italiano